Thingomatic Build @heatsynclabs
@VirgilVox's new Thing-o-Matic that arrived this weekend! It was a pretty easy build for him, except for the usual firmware programming issues (for the motherboard I just had a better timing touch, for the extruder we re-burned the bootloader and still couldn't upload until we finally we disconnected the molex and not-ethernet and it took... shrug)
The real annoyance was the mk7 build. Its their most recent creation, and the build instructions belay that. Theres 4 different positions you can assemble the bar mount and its incredibly difficult to understand which they actually want you to use. I built it one way and had to redo it later to make it fit the mounting bracket. Then @virgilvox reported having to rebuild it again after I left. Then the filament wouldn't go through and we had to rebuild it again. Finally @VirgilVox wanted to argue about which side the filament pusher was supposed to be on so he rebuilt it. Not a great experience.
After that we just had to tighten down the x and y belts and it was printing gorgeous 'out of the box'. I have to say it was a definitively advanced experience compared to the Cupcake days.
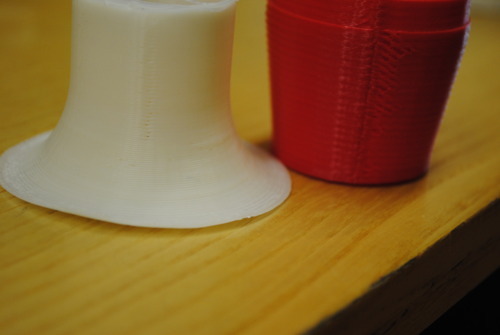
The real star of the show is certainly the new Mk7,though. Check out the resolution and z transition seam of the Mk7 and 1.75mm filament on the left and our custom Mk5 with 3mm filament on the right.